Scanning and repairing drive C issue usually occurs when the computer shuts down incorrectly. Sometimes this process gets stuck for minutes or hours.
In this post, we are going to list down some working methods to fix this scanning and repairing drive C that get stuck in Windows 10. This guide contains some practical solutions that might help you fix this issue.
Error “Scanning and repairing drive C stuck”
Some Windows users complained that Windows was scanning & repairing drive C and it got stuck midway. While some of the users reported that this message was displayed every time they turned on the PC. First of all, let’s get to know why does the PC scan the drive.
When a computer is running, the RAM and hard disk are reading & writing data. But when you shut a system unexpectedly, some data in RAM is lost. The next time the system gets booted, Windows scans the drive automatically.

Scanning and repairing drive C stuck at 100% complete
When the Windows tries to fix the issues and scan drive, it may get stuck in the midway of the scanning process. Sometimes this process is stopped precisely at 100% complete progress bar.
The following methods can fix the issue of scanning and repairing drive C stuck at 100% complete.
#1. Wait for scanning and repairing process to finish.
One of the most basic solutions for this issue is to let things happen precisely the way they are occurring.
So wait for the scanning and repairing process to finish it’s own. But what if the process gets stuck for hours? In such a case, you should consider other methods to resolve this issue.
#2. Disable automatic repair
If automatic repair is enabled, such error is more likely to occur. To avoid this scanning and repairing drive issue, the automatic repair setting must be disabled. To do so, you will need to enter the Windows Recovery Environment.
Step 1. Press and hold down the power button for 10 seconds to shut down the PC.
Step 2. Press the power button and when you see Windows icon, hold down the power button for 10s again to shut down PC.
Step 3. Repeat the step again and shut down the PC.
Step 4. Press the power on button to start the PC and wait for some time. You will see, you are in the Windows Recovery Environment.
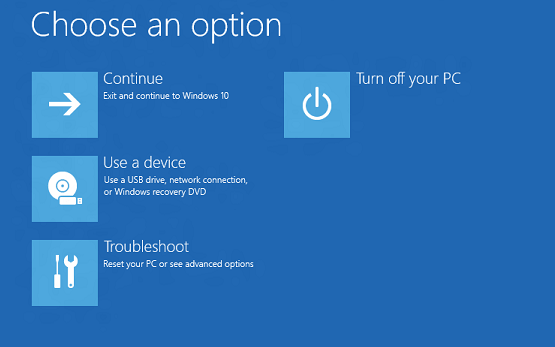
Step 5. Go to Troubleshoot > Advanced options > Command Prompt.
Step 6. Enter this command – bcdedit and note down the values of “identifier” and “recoveryenabled” below Windows Boot Loader.
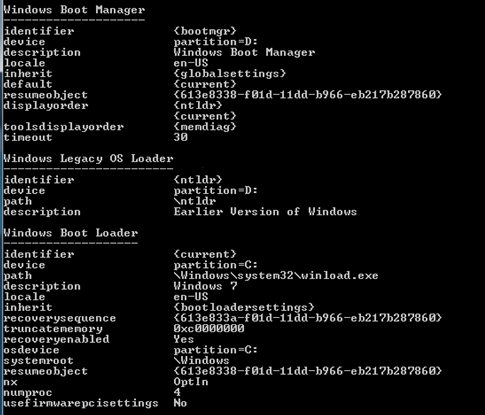
Step 7. Enter bcdedit /set {current} recoveryenabled no. to disable automatic repair.
Step 8. Restart computer.
#3. Recover Data
It is advisable to get a backup of entire data before trying out these fixes in the first place. In most cases, scanning & repairing process may cause a severe threat to your C drive. To avoid any risk, get a safe back up to recover later.
#4. Check the Disk connection
Have you done anything recently that may cause disk shifting or related error? Sometimes this repairing drive C stuck error may occur due to some issues between the system and disk. Therefore you must check the disk connection, and it might resolve the issue for you.
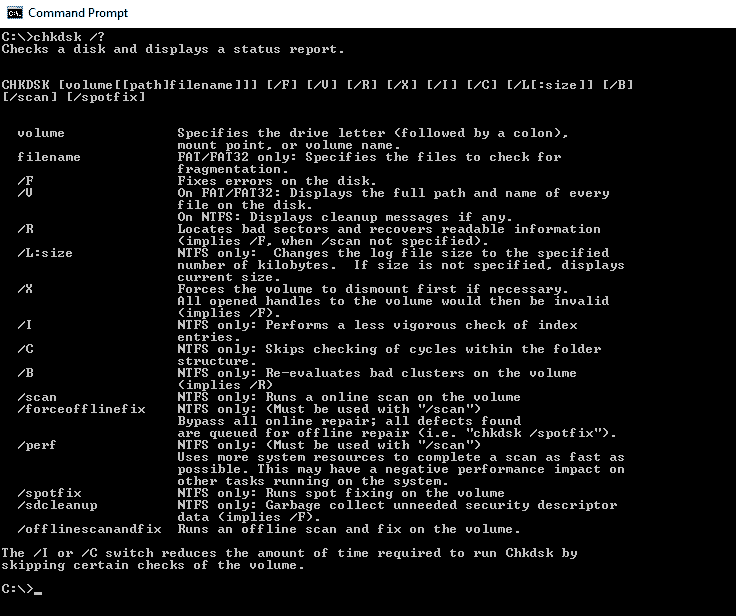
#5. Enter Safe Mode and run CHKDSK
This system drive got stuck error may occur due to disk errors like bad sectors.
You can choose the Safe Mode and then run CHKDSK to fix the issues.
Safe Mode kickstarts the system with minimal required services and drivers and thus is a diagnostic mode in which you can perform fixes.
Scanning and repairing c drive stuck at 11%
If you are facing the issue of scanning & repairing drive C getting stuck at 11%, then the solutions as given above can work out for you. When the drive scanning and repairing get held at 0, 10, 11, or 100%, then these solutions will fix it for you.
Scanning and repairing external drive stuck
When we attach an external drive to our system, it automatically starts scanning to avoid any file corruption or damage. Sometimes this scanning gets stuck on a percentage for over a long period. By long, we mean several hours.
So how should we deal with this situation? These are the following methods that can be used to fix the error.
- First of all, remove all the external peripherals attached to your computer.
- Secondly, you should check the disk in a safe mode.
- But when nothing works out for you, let the process finish on its own. Once the scanning is completed, it will resume its default situation.
How to stop scanning and repairing drive windows 10?
The best way to stop scanning and to repair drive in Windows 10 is to disable the automatic repair settings. When this option is disabled, the system won’t scan the drives next time you boot it. But this may put your system files under threat.
It is recommended to keep this option enabled and do not shut your system incorrectly. When the system is closed in the correct manner, it won’t scan drive every time the order is booted.