If you are using the Internet for a long time then you know sometimes we need to use VPN to access some websites. Internet is free, but many sites are country-specific. Also, VPN is used for a secure connection. If you are using Windows, then it is very easy to set up a VPN on Windows 10. If you want to Setup VPN on Windows, then here is all you need to know.
What Is a VPN?
First let’s understand, what is VPN. VPN is a service that allows you to connect to a private network from outside that private network. For example, you can access USA server from the UK. Nowadays, HTTPS becomes the standard for web browsing. HTTPS protocol doesn’t protect your traffic. It won’t won’t protect your system against threats on public Wi-Fi. That’s why you need a VPN (Virtual Private Network).
When you use a VPN, all your traffic passes through an encrypted tunnel. All your traffic travels through this tunnel. Even your ISP cannot trace and secure your traffic. You can use VPN on any Windows version. Hundreds of cities are available for the VPN. VPN server completely hides your current IP location. You can select other country VPN and access websites which are not available in your country.
How to Setup VPN on Windows 10
The beauty of all premier VPN providers is they have Windows 10 app which makes setting up a link as simple as clicking a massive green button that says “link”.
When you use a VPN, you can be certain that spies and advertisers are not sniffing your traffic, and other people will not intercept it. You may configure Windows 10 to use a VPN.
Do I Need to Set Up a VPN?
You need to set up VPN on your Windows 10 computer. You can do this manually, or you can use VPN Apps. All the VPN services we have tested thus far that will handle the configuration and switching between VPN servers.
Popular VPN Services in 2019
- NordVPN ($3 monthly)
- ExpressVPN ($9 monthly)
- Private Internet Access ($3 monthly )
- IPVanish ($7 monthly)
Also Read: WMI Provider Host High CPU Usage
How to Setup VPN on Windows 10 Manually
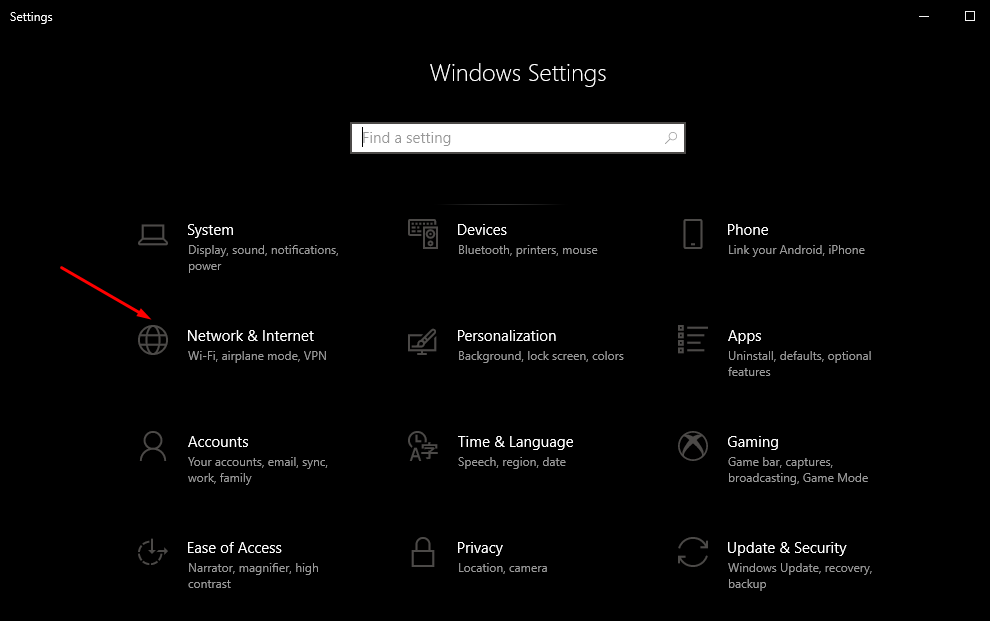
Step 1: Press Win + I to open Settings in Windows 10.
Step 2: Now click on Network and Internet.
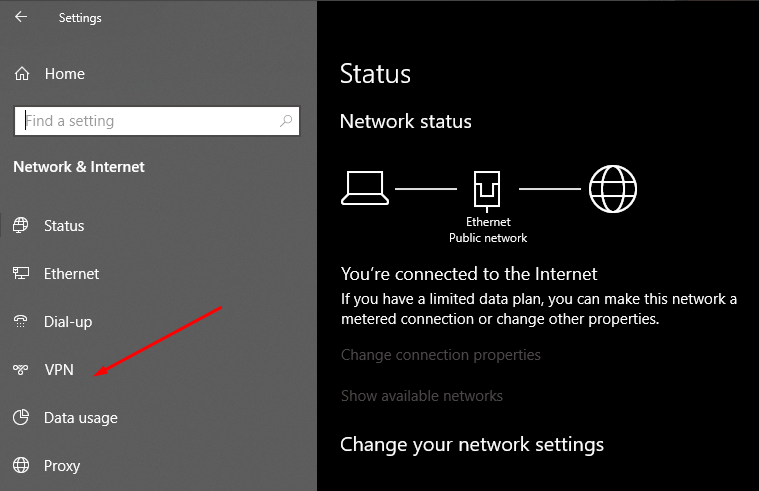
Step 3: Now, from the left side, select VPN.
Step 4: Choose Windows built-in for VPN provider.
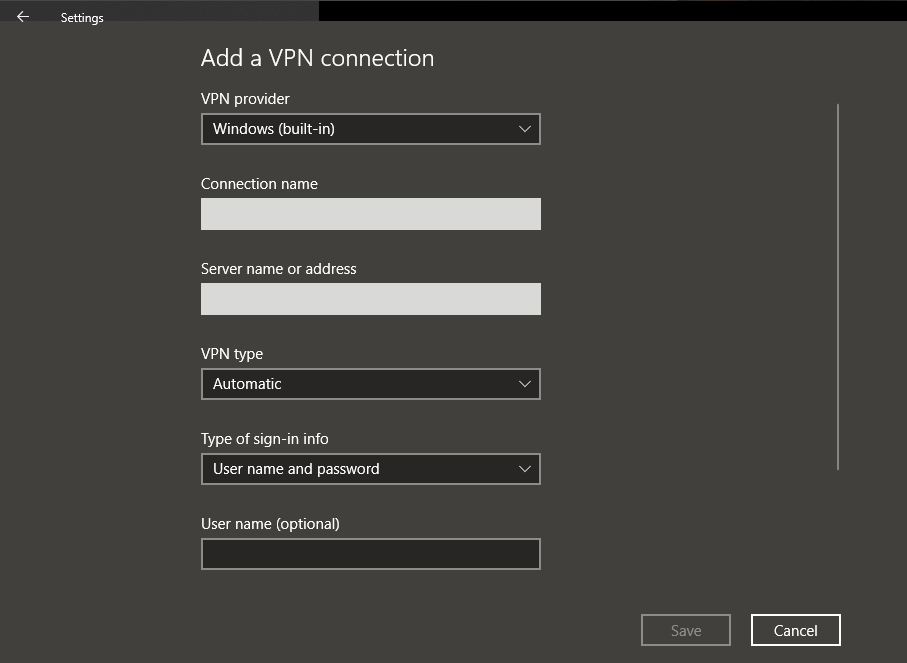
Choose Connection Name, Server Name, VPN type, and then enter your Sign information. Lastly, click on save.
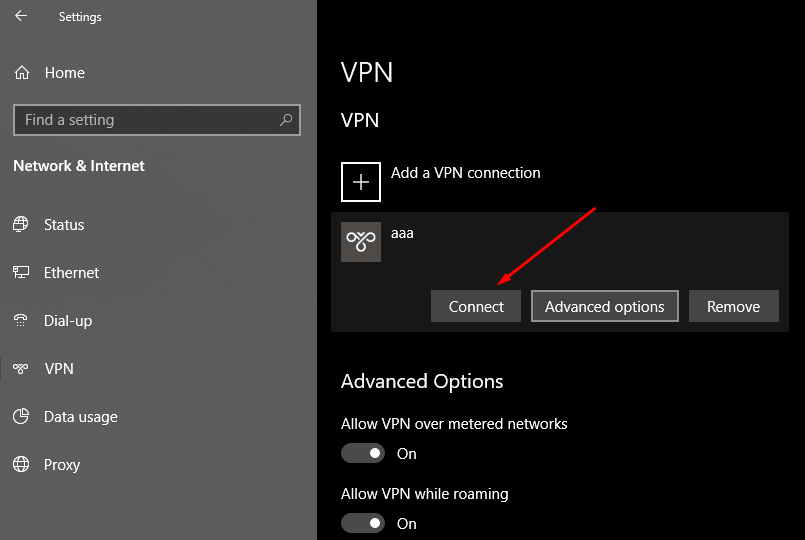
Step 5: Now, you can see your newly made VPN connection under the VPN section. Click on it and then choose Connect.
How to Setup VPN on Windows 10 using Express VPN
Express VPN is one of the most advanced and popular VPN tools. It is a premium tool for Windows, Mac, and Linux platforms. Here is a complete guide on how to use Express VPN on Windows.
Step 1: First go to expressvpn.com website and then log in to your account.
Step 2: Go to https://www.expressvpn.com/vpn-software/vpn-windows and then download ExpressVPN for Windows App.
Step 3: Once download, install it. Click on ExpressVPN app and open it.
Step 4: Once launched, click on choose location button and you will see all the available servers.
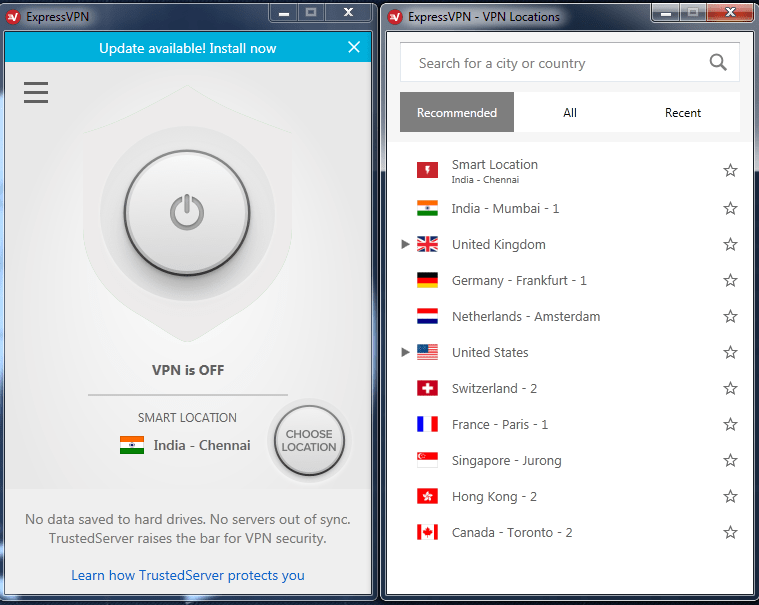
Step 5: Double click on any server and then wait for some time. It will automatically connect to that country server.
That’s it.
VPN is the response to such queries as it gives a safe connection and prevents other people from accessing your individual details. A private VPN is one which’s restricted to a particular group of individuals. No matter what you do, avoid using totally free VPNs!
VPN is used to open the region-specific blocked content on the web. Click the VPN that you would like to use. With the aid of this blog, you can find out the way to setup VPN on Windows 10 on your own and give you relevant info on how VPN works. As an example, a many VPN client requires you to download a distinctive client together with configuration files.
There are several VPN service providers available, paid and free, and it might be really hard to choose one.