Adobe Acrobat is an application software developed by Adobe Inc. which provides Web Services. It is used to modify, edit, create and open a specific type of file which is known as pdf format. It can deal with various types of PDF content such as forms and multimedia. You can also print, sign, and annotate PDF. It is a free and trusted software used on a global basis. Adobe acrobat is a very useful PDF reader. It is available in Windows, Linux, Android, and iOS. Adobe Inc. Launched Adobe acrobat in 1993. There are a lot of pdf readers in the market but ahead of acrobat is still on the top.
What Is a DDE Server?
DDE is an inter-process server that comes under Microsoft Windows. It is usually for communication between two devices or servers. This server communicates with the device to gain information and provide it to the DDE client. It works on a client-server principle who told work is Data transferring.
Reasons for the Acrobat Failed To Connect To A DDE Server?
Antivirus- Antivirus is the main security system of a system. Sometimes the antivirus can cause interference between the other applications. If the antivirus constricts the DDE server then you will see this error. Disable your antivirus to see if this is the cause of the error. If the problem is with the antivirus contact the service provider or it is high time to change the antivirus.
Acrobat version- when the adobe acrobat version is an older one then this error can show up. the older version cannot work properly with the DDE server. Because of that, you should check whether your version is updated or not.
Multiple Files- When the user tries to merge multiple files together, then the application cannot handle such load and shows this error.
Fix Acrobat Failed To Connect To A DDE Server Error?
Here are all working methods to fix Acrobat Failed To Connect To A Dde Server issue on Windows. Kindly follow these steps carefully and comment reviews.
Method 1- protect mode
Step 1- turn on your acrobat application.
Step 2- Click on the Edit Tab.
Step 3- Now go to the preferences option.
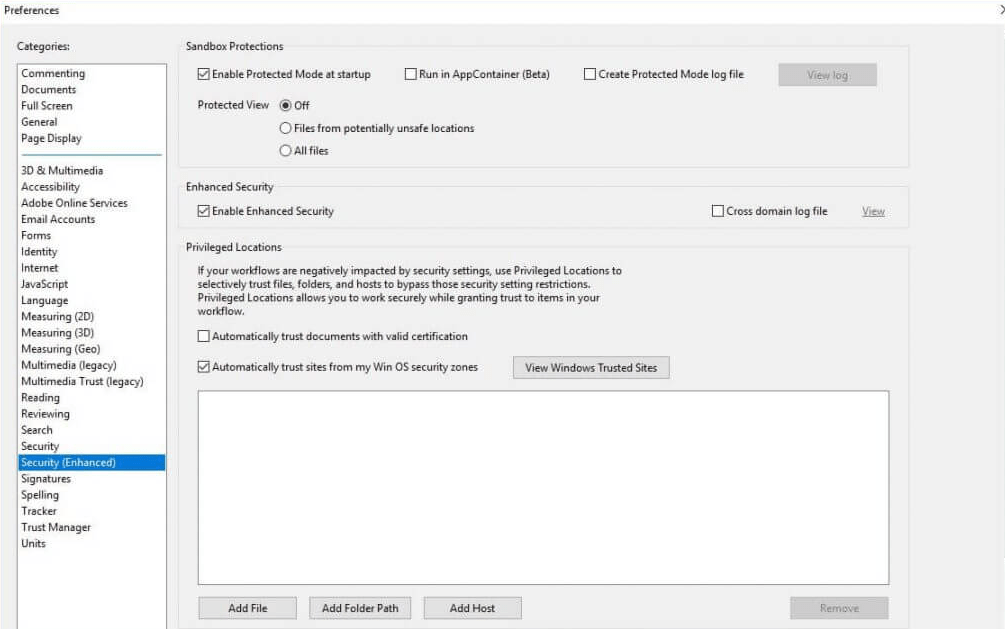
Step 4- Now under the categories click on security(enhanced).
Step 5- look for the checkbox that says enable protected mode on startup.
Step 6- if the checkbox is checked then make sure to uncheck it.
Step 7- reopen the Adobe acrobat application to check if the issue persists.
Recommended: Fix World of Warcraft was unable to start up 3D acceleration
Method 2- update
Step 1- Press Windows key+R button to open the Run dialogue box
Step 2- Type “appwiz.cpl” and hit enter.
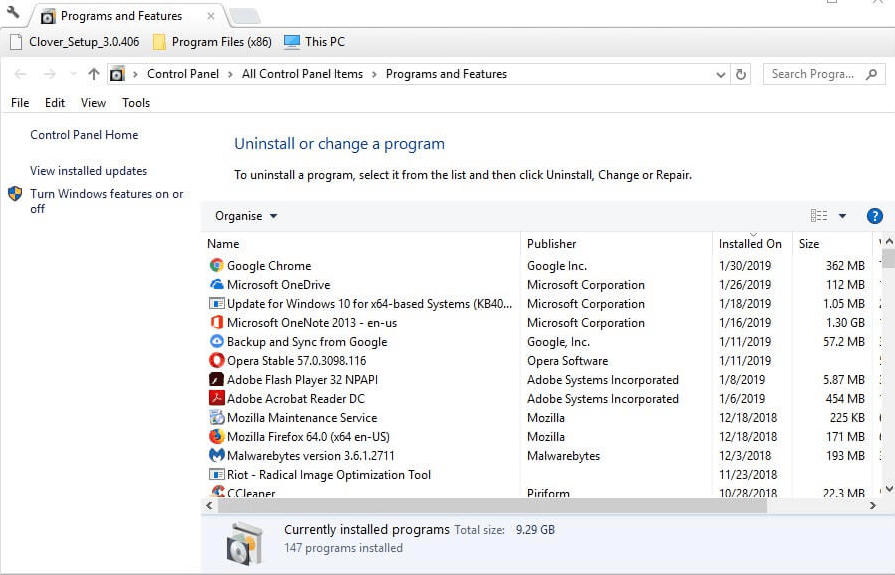
Step 3- now programs and features control panel window will open.
Step 4- look for the Adobe Acrobat software on the list.

Step 5- right-click on the program and click uninstall.
Step 6- now click on the yes button to start the installation process.
Step 7- Restart your system and go to the official website of Adobe Acrobat.
Step 8- download the latest version of Adobe Acrobat and install it.
Method 3- registry
Step 1- Press the Windows key+R button to open the run dialogue box.
Step 2- Type “regedit” and hit enter.
Step 3- the registry window will open, and enter, “Computer\HKEY_CLASSES_ROOT\acrobat\shell\open\ddeexec\application” in the address bar and press enter.
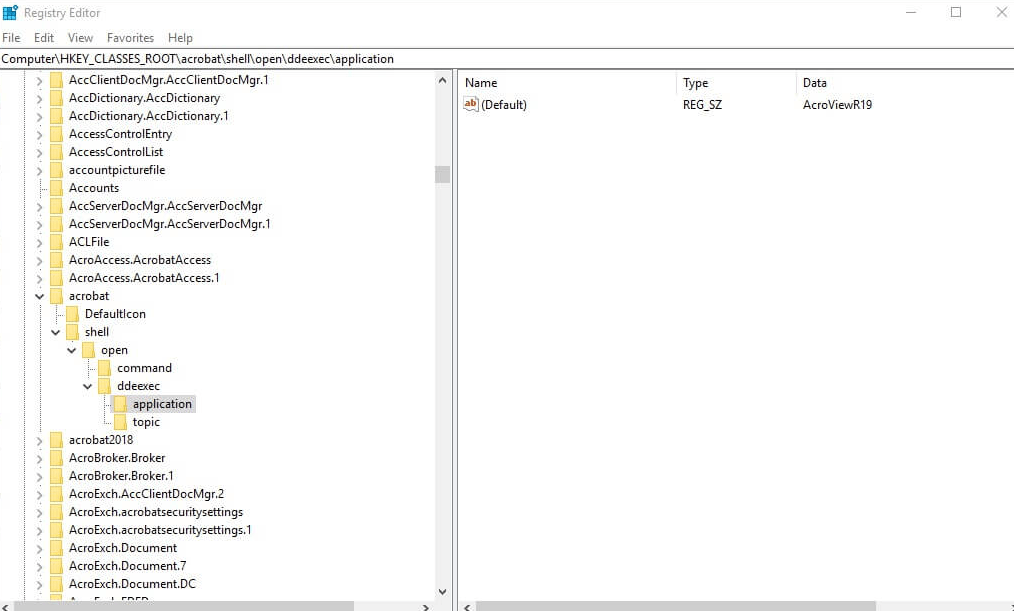
Step 4- on the right-hand side of the window you will see a default label.
Step 5- double click on the default label. It will open the edit window.
Step 6- look for the Value data box and delete the current “AcrobiewA18” from the textbox.
Step 7- Now type, “AcroviewR18” in the textbox.
Step 8- click the ok button and restart Windows after editing.
Method 4- Repair
Step 1- again press the Windows key+R button to open the run dialogue box.
Step 2- type “appwiz.cpl” and hit enter.
Step 3- now Right-click on the Adobe Acrobat software and select change.
Step 4- Now select the option that says repair installation errors in the program.
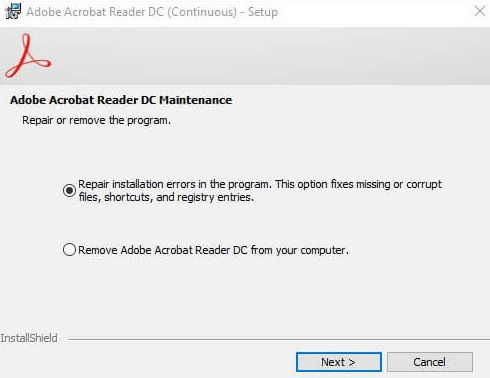
Step 5- press the next button until it shows finish, after which you can click on the finish button to repair the program.
Method 5- restart the software
Step 1- Press control, shift and escape keys on your keyboard simultaneously to open the task manager window.
Step 2- in the processes tab look for the Adobe Acrobat program and select it by clicking on it.

Step 3- After selecting the Adobe acrobat program look for the enter button based on the bottom right corner of the screen.
Step 4- click on the enter button completely shut down the Adobe acrobat program.


Comments are closed.