The computer mouse is a crucial external device that is mostly used by every computer user for inputs. It allows to user to swiftly conclude action on the computer system whether it is a laptop or PC. A mouse is an imperative peripheral on Windows 10. It allows you to operate and cease the actions on your desktop or applications smoothly. If you have bought a mouse for your computer and the cursor speed is a bit slow or fast, and you want to change the cursor speed according to your preference, it can be done quickly.
Here in this post, we are going to describe how you can change the speed sensitivity of your mouse. Let’s begin.
Change Your Mouse Speed in Windows 10
Suppose you are working on your computer or merely surfing the internet and your work and action are taking time because of the low-speed mouse cursor, and it requires to be adjusted. Please follow these simple Step s to change the mouse sensitivity.
#1. Adjust the mouse speed through Settings
Step 1. Open the “Settings” from the “Start” menu.
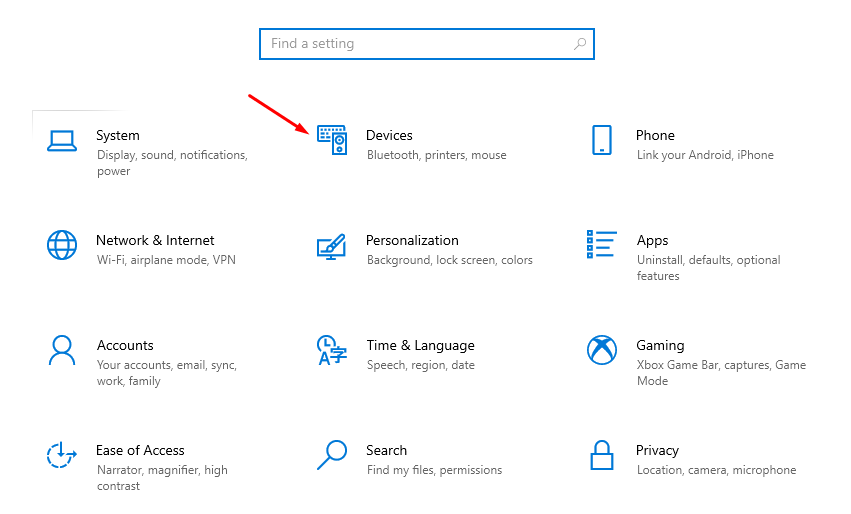
Step 2. Click on the “Devices” option and then select “Mouse” from there.

Step 3. There you will see a “Cursor slider.”
Step 4. Change the mouse speed using the “Cursor slider” as per your requirement.
Step 5. After completing the above procedure, your mouse will run at your specified speed.
#2. Adjust your mouse speed utilizing Control Panel
Step 1. Open the “Control Panel” on your computer system and then click on the “Hardware and Sound” option.

Step 2. Press right-click on the “Devices and Printers.”

Step 3. Select the “Mouse” option and then click on the “Pointer Options” tab.
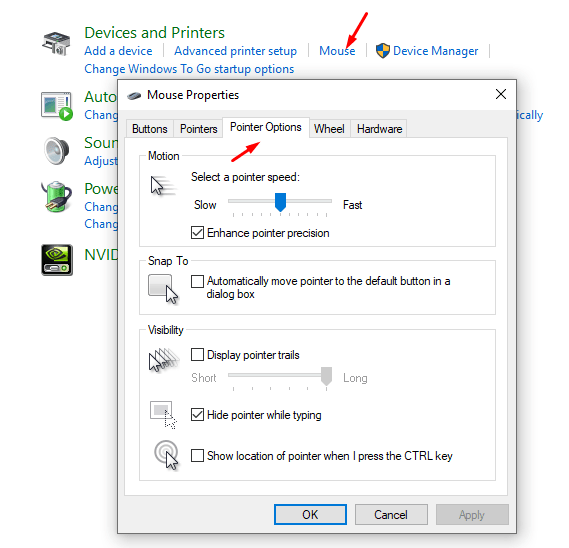
Step 4. You will see a slider under the “Motion” section; use it to adjust the desired speed.
Step 5. Now click on “Apply” and then click Ok to save the changes.
#3. Adjust mouse speed using Registry Editor
Step 1. Open the “Start” menu and search “Regedit” using the search bar.
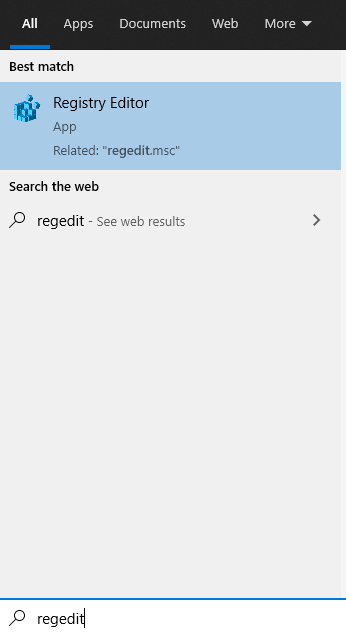
Step 2. Click the result on top to open the “Registry.”
Step 3. After opening the “Registry,” navigate to the below path:
HKEY_CURRENT_USER\CONTROL PANEL\MOUSE
Step 4. After the above path navigation, open the “Mouse Sensitivity” key and set the desired speed value to any particular number from 1 to 20.
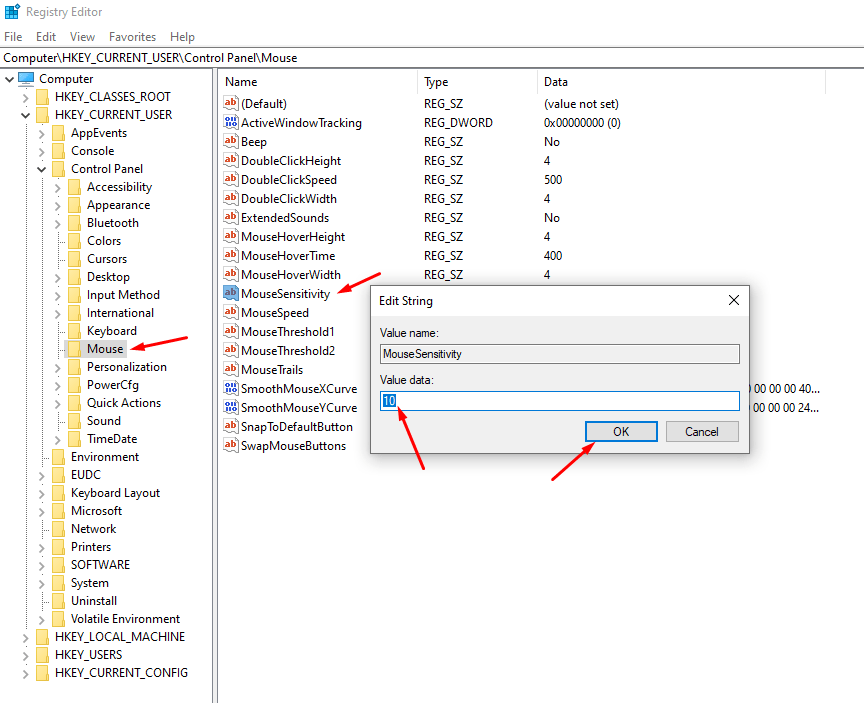
Step 5. After setting up the required speed, click on the Ok button and restart your computer system.
Kindly note that the default set speed for the mouse cursor is 10. Any number less than 10 will make the pace slower, and in the same way, any number more than 10 will make the mouse pointer fast. So if the new settings are not working out for you, you can go back following the same Step s and set the speed to 10. Also, it is crucial to create a data backup before you move further making any changes in the Registry Editor.
Change Gaming Mouse Scroll Speed Windows 10
If you are using a gaming mouse instead of a regular one, then you can adjust your mouse pointer speed using third-party software. The gaming mice are quite advanced, and when you buy one, you will be provided with software from the manufacturer that you can use to set up the settings concerning your movements and speed. Also, it has a DPI button which makes your setup more accessible, for instance, if you want to change the mouse pointer speed, you can press the DPI button on your mouse. And after adjusting the speed, save the changes directly through your mouse without touching Windows settings or any other alternatives.
Kindly note that changing the mouse pointer speed using the DPI will be temporary and it shall be overwritten on the Shutdown. If you want to make the mouse speed-related changes permanently, then try out the methods as mentioned earlier, i.e. changing the speed using Settings and the Control Panel.
How To Fast And Slow The Mouse Speed
Suppose you want your mouse pointer to be fast then you can opt for the methods mentioned above. Open the Settings and follow the Step s as mentioned above, then adjust the required fast speed using the “Cursor slider” and then save the changes. On the other hand, you can go ahead using the Control Panel. All you’ll have to do is open the “Control Panel” and follow the Step s mentioned above and then set your desired speed using the slider under the “Motion” section. After setting up the required fast pace, click on “Apply” and save the changes.
On the other hand, if you want the mouse pointer to be slow, follow the same above mentioned procedure and lessen the speed on the slider instead of increasing it and then save the changes.
Wrapping Up
A mouse is one of the essential peripherals, and it allows the user to work conveniently and to operate smoothly. If you are having an issue with your mouse sensitivity, then you can change the mouse pointer speed fast or slow as per your requirement. Please go through all the details and then choose which method you want to apply for adjusting your mouse speed. Now after reading this post if you ever face such an issue, then you know what you need to do to change the mouse speed. We hope that we have guided you well and our post was informative and helpful for you. Thank you for reading.