Stable footage, clean sound, and simple editing will improve a home video faster than any expensive camera. Start by holding the camera steady, facing your subject toward soft light, recording clear audio, and cutting anything that does not help the story. These basics matter whether you are filming a birthday, a school project, a family interview, or a product demo at your kitchen table.
TLDR: Use a tripod or steady surface, place your subject near a window, and record audio as close to the speaker as possible. A simple three-minute family video can feel twice as polished when shaky clips are removed and background noise is reduced. For example, if you shoot 20 short clips at a child’s recital, expect to use only 30% to 40% of them in the final edit. Label your files the same day, or you may waste 20 minutes later trying to find the best shot.
1. Keep the Camera Still Before You Try Anything Fancy
Most weak home videos fail because the camera moves too much. Shaky footage feels careless. It also makes viewers tired. The fix is simple: use support.
- Use a tripod for interviews, cooking videos, musical performances, and family events.
- Brace your elbows against your body when filming handheld.
- Lean against a wall if you must stand and shoot for a long time.
- Move slowly if you pan across a room. Fast panning looks messy.
If you use a phone, hold it with both hands. For most home viewing, shoot horizontally unless the final video is meant only for vertical platforms. Clean the lens before recording. It sounds too basic, but fingerprints soften the image and make lights smear across the frame.
2. Use Light That Makes People Look Natural
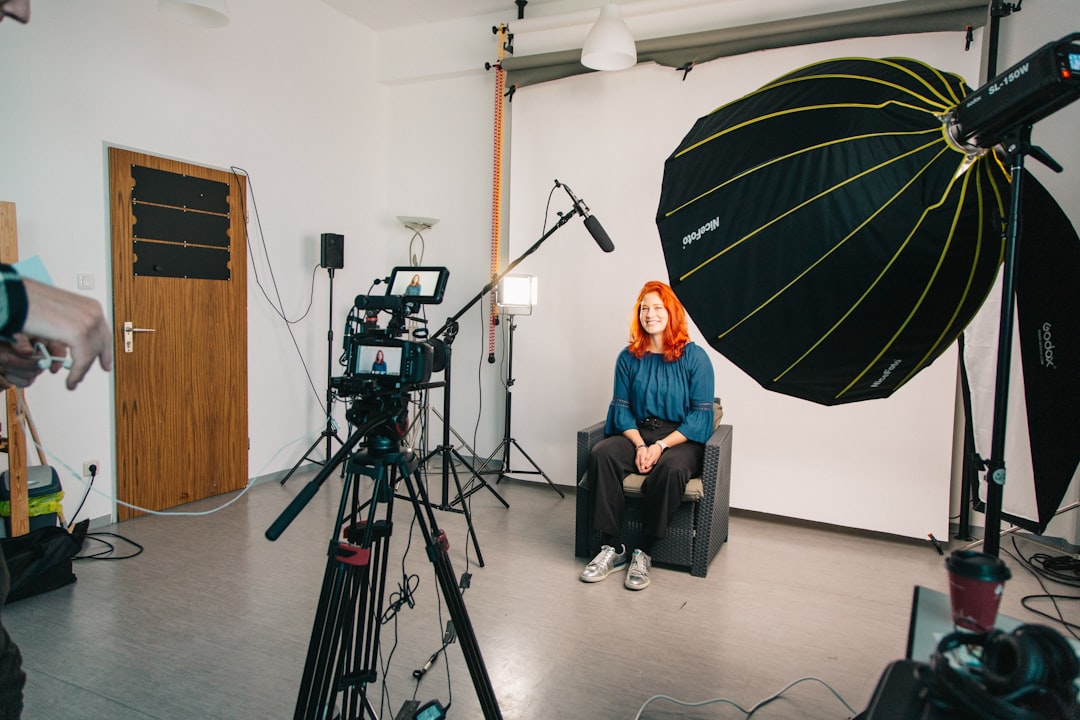
Good lighting does not have to be expensive. A window, a lamp, and a little care can do a lot. The safest choice is soft light from the front or side. Place your subject facing a window, not standing with their back to it. Backlighting turns faces dark and forces the camera to guess.
Avoid harsh overhead light when possible. It creates deep shadows under the eyes. If the room looks too dark, add a lamp at face height. If the light looks too sharp, soften it with a white curtain or by bouncing it off a pale wall.
Watch the background too. Bright windows, shiny picture frames, and TV screens pull attention away from the subject. Turn off screens. Close blinds slightly. Remove clutter near the person’s head. Serious videos often look better simply because the frame is calmer.
3. Treat Audio as Half the Video
Viewers will forgive a slightly soft image. They will not forgive audio they cannot understand. Poor sound feels amateur right away. Record in a quiet room. Turn off fans, dishwashers, televisions, and loud air conditioning. Close windows if traffic noise leaks in.
The closer the microphone is to the speaker, the better. A small clip-on microphone often beats the built-in camera mic. If you do not have one, place the phone or camera closer to the person speaking. For interviews, keep the speaker within about one meter of the recording device when possible.
- Do a 10-second test recording before filming the real take.
- Listen with headphones to catch hums, buzzes, and echoes.
- Ask people to pause before answering. It helps with editing.
- Record room tone for 15 seconds. This helps smooth audio cuts later.
Honestly, it feels like many editing apps hide the audio controls three taps deeper than they should. Still, check them. Lower music under speech. Keep voices consistent from clip to clip. A good target is speech that sounds clear without forcing the viewer to raise the volume.
4. Compose the Frame With Purpose
Composition is not decoration. It tells the viewer where to look. Keep faces, hands, and action easy to see. Use the rule of thirds as a starting point: place the subject slightly off center rather than dead in the middle. For interviews, leave a little space in the direction the person is looking.
Watch the edges of the frame. Cut off less important space, not heads or hands. If someone is demonstrating a recipe, show the bowl, tools, and hands. If a child is opening a gift, stay wide enough to capture the reaction and the object.

Use variety, but do not overdo it. A useful home video sequence often includes:
- Wide shot: Shows the room or full scene.
- Medium shot: Shows the person and nearby action.
- Close shot: Shows faces, hands, details, or objects.
This gives you options during editing. It also makes the finished video feel intentional instead of random.
5. Record Shorter Clips and Plan the Story
Long clips create long edits. Expect to waste time on them if you let the camera run for ten minutes at a time. Record in short sections. Start a clip a few seconds before the action. Stop after the moment is complete. This makes sorting easier and keeps storage under control.
Before filming, ask one question: What should the viewer understand or feel by the end? For a family trip, the answer may be warmth and memory. For a home repair video, it may be clear instruction. For a school presentation, it may be confidence and proof of work.
A simple structure works well:
- Start: Where are we, and who is involved?
- Middle: What happens?
- End: What changed, or what is the result?
This structure stops the video from becoming a pile of unrelated clips.
6. Organize Files the Same Day
File organization sounds boring because it is. It is also the difference between a fast edit and a miserable one. Transfer footage as soon as possible. Create folders by date and event. Rename key clips if the project matters.
Use a clear folder pattern such as:
- 2026 04 12 Birthday Party
- Footage
- Audio
- Music
- Exports
Back up important footage in at least two places. Use an external drive, cloud storage, or both. Memory cards fail. Phones get lost. Laptops crash at the worst possible time. A serious video habit includes backup, not panic.
7. Edit With Discipline
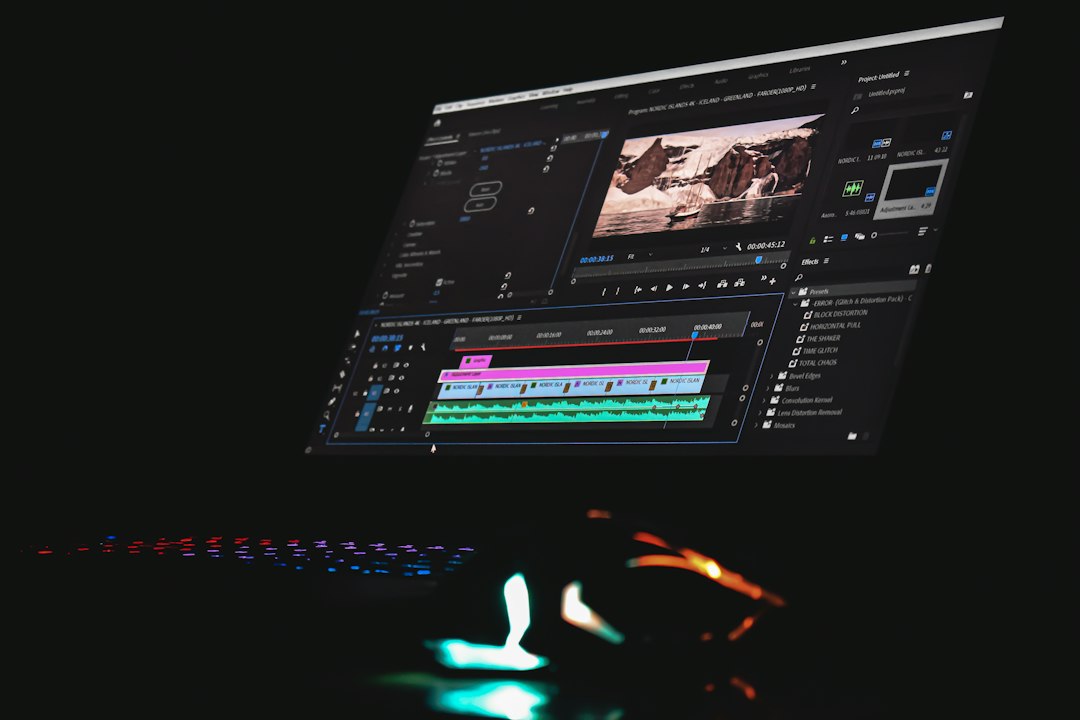
Editing is where home videos become watchable. Cut weak openings, dead air, repeated lines, and shaky sections. Keep only the best version of each moment. If two clips say the same thing, use the stronger one.
Start with a rough cut. Put clips in order. Do not worry about tiny details yet. Then trim. Then adjust sound. Then add titles, music, and color correction if needed. Keep titles readable and plain. Avoid wild transitions. A clean cut is usually better than a spinning effect.
Music can help, but it should not fight the story. Lower it during speech. Use licensed or royalty-free tracks, especially if the video will be shared online. It drives me crazy that some apps add flashy templates faster than they let you fix uneven volume, but volume matters more.
8. Export for the Way People Will Watch
Export settings should match the purpose. For most home videos, 1080p is enough. Use 4K if you filmed in 4K, need extra sharpness, or want to crop later. Keep a high-quality master file, then make smaller versions for sharing.
Check the final video before sending it. Watch the first 30 seconds, a middle section, and the ending. Listen for sudden volume jumps. Look for black frames, spelling errors, and accidental clips. These small checks prevent embarrassing mistakes.
Final Checklist for Better Home Videos
- Steady camera: Tripod, two hands, or solid support.
- Clean light: Face the subject toward soft light.
- Clear audio: Get the mic close and reduce noise.
- Strong composition: Remove clutter and frame with intent.
- Short clips: Record what matters, then stop.
- Organized files: Sort, label, and back up footage.
- Tight edit: Cut anything that slows the video down.
Better home video is not about owning the newest camera. It is about making careful choices before, during, and after recording. Keep the image steady. Make the sound clear. Respect the viewer’s time. Do that, and your videos will feel sharper, calmer, and far more worth watching.